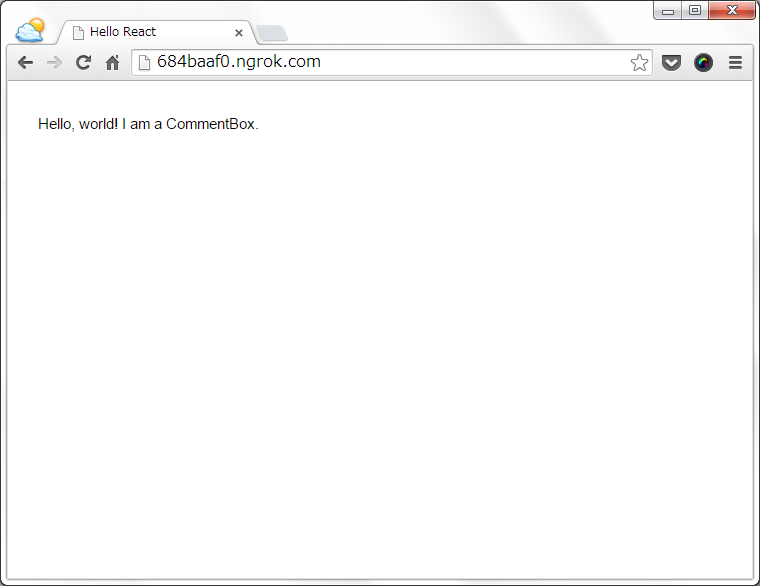
Reactは公式のドキュメントサイトが丁寧に書かれているので、Tutorial に習いながら勉強すると良さそうです。手順はTutorialに従いますが、JSXのコンパイルはGulpとBrowserifyを使うように変更して進めていきます。オリジナルのTutorialのGitHubのリポジトリはreactjs/react-tutorial です、今回修正しながら作成したリポジトリはmasato/react-tutorial にpushしています。
プロジェクトの作成 最初にプロジェクトの作成をします。
$ mkdir -p ~/react_apps/react-tutorial
$ cd !$
$ mkdir -p public/{javascripts,stylesheets} src
必要なパッケージをインストールします。
$ npm init
$ npm install -g gulp
$ npm install --save-dev gulp react browserify reactify vinyl-source-stream vinyl-buffer gulp-uglify
package.jsonのdevDependenciesに開発用モジュールの設定が入りました。
{
  "name": "tutorial",
  "version": "1.0.0",
  "description": "",
  "main": "gulpfile.js",
  "scripts": {
    "test": "echo \"Error: no test specified\" && exit 1"
  },
  "author": "Masato Shimizu",
  "license": "ISC",
  "devDependencies": {
    "body-parser": "^1.10.0",
    "browserify": "^8.0.2",
    "express": "^4.10.6",
    "gulp": "^3.8.10",
    "gulp-uglify": "^1.0.2",
    "react": "^0.12.2",
    "reactify": "^0.17.1",
    "vinyl-buffer": "^1.0.0",
    "vinyl-source-stream": "^1.0.0"
  }
}
チュートリアル 1 - コンポーネントを1つ作成 スタイルシートはreactjs/react-tutorial からダウンロードします。
$ wget -P public/stylesheets https://raw.githubusercontent.com/reactjs/react-tutorial/master/public/css/base.css
index.htmlを作成します。jsにコンパイルしたapp.jsファイルはbody要素の中でロードします。
~/react_apps/react-tutorial/public/index.html <!DOCTYPE html > <html > <head > <title > Hello React</title > <link rel ="stylesheet" href ="stylesheets/base.css" /> <script src ="http://code.jquery.com/jquery-1.10.0.min.js" > </script > </head > <body > <div id ="content" > </div > <script src ="javascripts/app.js" > </script > </body > </html >
Tutorialでは一つのファイルですが、コンポーネントを記述するファイルは、component.jsxとして分割しました。CommentBoxはexportします。
~/react_apps/react-tutorial/src/comment.jsx var React = require ('react' );var CommentBox = React.createClass({ render: function ( return ( <div className="commentBox" > Hello, world! I am a CommentBox. </div> ); } }); module .exports = CommentBox;
Reactのメインとなるmain.jsを作成します。ComponentBoxはrequireしてJSXのコンポーネントとして記述します。
~/react_apps/react-tutorial/src/main.js var React = require ('react' );var CommentBox = require ('./comment.jsx' );React.renderComponent( <CommentBox />, document .getElementById('content' ) );
gulpfile.jsはbrowserifyでJSXファイルをコンパイルして、JSファイルをuglifyするだけの最低限のタスクを実行します。
~/react_apps/react-tutorial/gulpfile.js var gulp = require ('gulp' );var buffer = require ('vinyl-buffer' );var source = require ("vinyl-source-stream" );var browserify = require ('browserify' );var reactify = require ('reactify' );var uglify = require ('gulp-uglify' );gulp.task('browserify' , function ( var bundler = browserify('./src/main.js' ,{ debug : true }); return bundler .transform(reactify) .bundle() .pipe(source('app.js' )) .pipe(buffer()) .pipe(uglify()) .pipe(gulp.dest('./public/javascripts' )); });
gulp browserifyタスクを実行してJSXファイルをコンパイルします。
$ gulp browserify [16:58:03] Using gulpfile ~/react_apps/tutorial/gulpfile.js [16:58:03] Starting 'browserify' ... [16:58:05] Finished 'browserify' after 1.98 s
一度ブラウザで確認してみるため、PythonのSimpleHTTPServerをpublicディレクトリに移動してから起動します。
$ cd ~/react_apps/react-tutorial/public
$ python -m SimpleHTTPServer 3000
Dockerホストから開発用のコンテナのIPアドレスを確認してから、ngrokを起動してトンネルさせます。
$ docker inspect --format="{{ .NetworkSettings.IPAddress }}" dev
172.17.1.157
$ docker run -it --rm wizardapps/ngrok:latest ngrok 172.17.1.157:3000
ブラウザで確認します。http://684baaf0.ngrok.com/
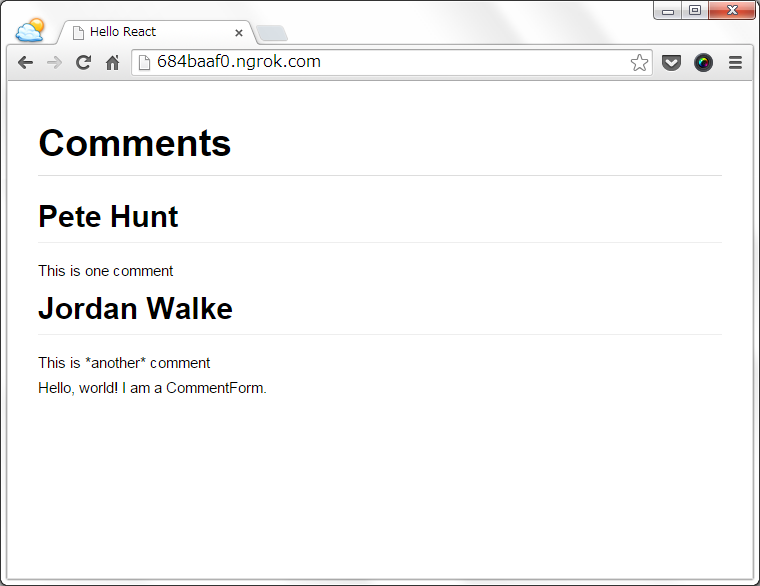
チュートリアル 2-5 - コンポーネントを複数で構成 チュートリアルの2から5では以下のようのコンポーネントの作成と構成を行います。
- CommentBox
  - CommentList
    - Comment
  - CommentForm
comment.jsxの中に、CommentList、Comment、CommentFormコンポーネントを作成していきます。
~/react_apps/react-tutorial/src/comment.jsx var React = require ('react' );var Comment = React.createClass({ render: function ( return ( <div className="comment" > <h2 className="commentAuthor" > {this .props.author} </h2> {this .props.children} </div> ); } }); var CommentList = React.createClass({ render: function ( return ( <div className="commentList" > <Comment author="Pete Hunt" >This is one comment</Comment> <Comment author="Jordan Walke" >This is *another* comment</Comment> </div> ); } }); var CommentForm = React.createClass({ render: function ( return ( <div className="commentForm" > Hello, world! I am a CommentForm. </div> ); } }); var CommentBox = React.createClass({ render: function ( return ( <div className="commentBox" > <h1>Comments</h1> <CommentList /> <CommentForm /> </div> ); } }); module .exports = CommentBox;
gulp browserifyタスクを実行してJSXファイルをコンパイルします。
$ gulp browserify [18:37:06] Using gulpfile ~/react_apps/react-tutorial/gulpfile.js [18:37:06] Starting 'browserify' ... [18:37:10] Finished 'browserify' after 3.93 s
ブラウザで確認します。
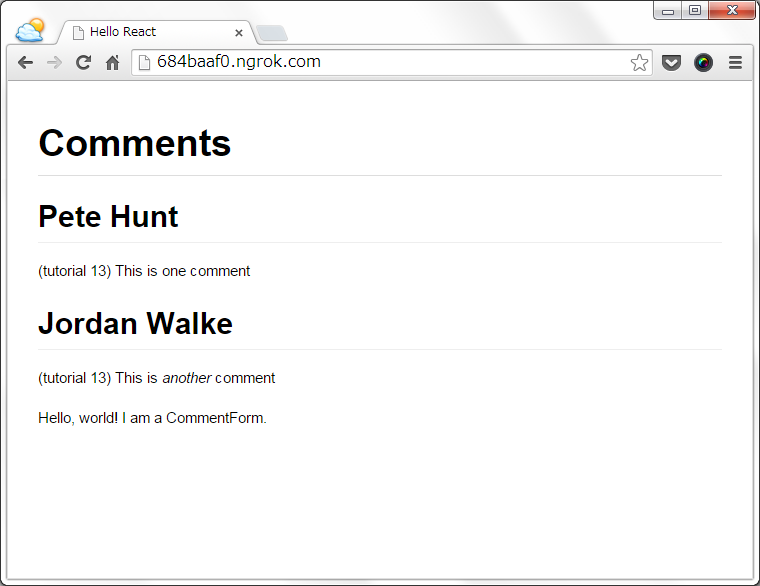
チュートリアル 6-13 - コンポーネントに引数を渡す チュートリアル6からは、Markdownをコードの中で変換するためにShowdown を使います。requireでなくscript要素からロードします。
~/react_apps/react-tutorial/public/index.html <!DOCTYPE html > <html > <head > <title > Hello React</title > <link rel ="stylesheet" href ="stylesheets/base.css" /> <script src ="http://code.jquery.com/jquery-1.10.0.min.js" > </script > <script src ="http://cdnjs.cloudflare.com/ajax/libs/showdown/0.3.1/showdown.min.js" > </script > </head > <body > <div id ="content" > </div > <script src ="javascripts/app.js" > </script > </body > </html >
main.jsではJSONのデータを作成し、CommentBoxコンポーネントへ引数として渡します。
~/react_apps/react-tutorial/src/main.js var React = require ('react' );var CommentBox = require ('./comment.jsx' );var data = [ {author : "Pete Hunt" , text : "(tutorial 13) This is one comment" }, {author : "Jordan Walke" , text : "(tutorial 13) This is *another* comment" } ]; React.renderComponent( <CommentBox data={data} />, document .getElementById('content' ) );
main.jsからCommentBoxコンポーネントへ引数として渡されたdataはthis.props.dataとして参照することができます。<CommentList data={this.props.data} />のようにCommentListコンポーネントの引数として渡します。
~/react_apps/react-tutorial/src/comment.jsx var React = require ('react' );var converter = new Showdown.converter();var Comment = React.createClass({ render: function ( var rawMarkup = converter.makeHtml(this .props.children.toString()); return ( <div className="comment" > <h2 className="commentAuthor" > {this .props.author} </h2> <span dangerouslySetInnerHTML={{__html: rawMarkup}} /> </div> ); } }); var CommentList = React.createClass({ render: function ( var commentNodes = this .props.data.map(function (comment ) return ( <Comment author={comment.author}> {comment.text} </Comment> ); }); return ( <div className="commentList" > {commentNodes} </div> ); } }); var CommentForm = React.createClass({ render: function ( return ( <div className="commentForm" > Hello, world! I am a CommentForm. </div> ); } }); var CommentBox = React.createClass({ render: function ( return ( <div className="commentBox" > <h1>Comments</h1> <CommentList data={this .props.data} /> <CommentForm /> </div> ); } }); module .exports = CommentBox;
gulp browserifyタスクを実行したあと、ブラウザで確認します。
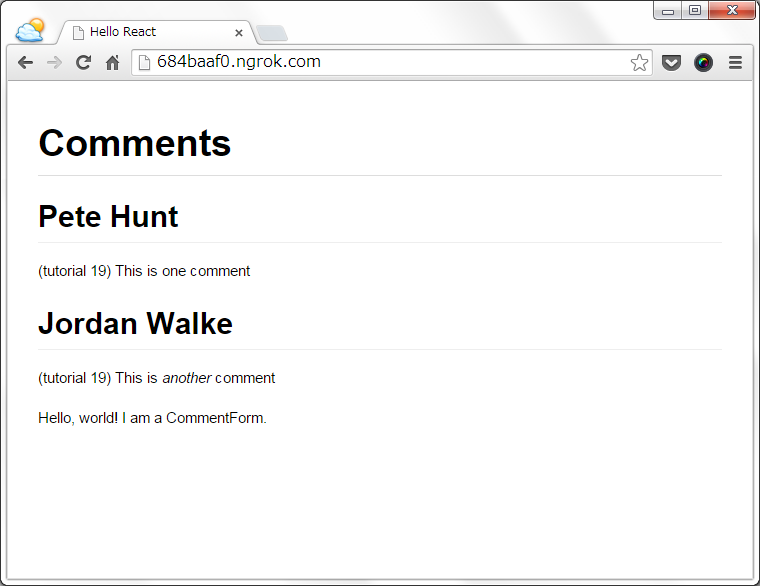
チュートリアル 14-19 - Ajax main.jsで作成していたJSONデータを、urlを指定してAjaxで取得するように変更します。pollIntervalもCommentBoxの引数としてAjaxのポーリング間隔を指定します。
~/react_apps/react-tutorial/src/main.js var React = require ('react' );var CommentBox = require ('./comment.jsx' );React.renderComponent( <CommentBox url="comments.json" pollInterval={2000 } />, document .getElementById('content' ) );
comment.jsxはCommentBoxコンポーネントだけ修正します。getInitialStateのstateで初期化するdataはmutableな変数として、this.state.dataのように参照と、this.setState({data: data})のように代入ができます。一方immutableな変数は、this.props.pollIntervalとして参照のみ可能です。
~/react_apps/react-tutorial/src/comment.jsx ... var CommentBox = React.createClass({ loadCommentsFromServer: function ( $.ajax({ url: this .props.url, dataType: 'json' , success: function (data ) this .setState({data : data}); }.bind(this ), error: function (xhr, status, err ) console .error(this .props.url, status, err.toString()); }.bind(this ) }); }, getInitialState: function ( return {data : []}; }, componentDidMount: function ( this .loadCommentsFromServer(); setInterval (this .loadCommentsFromServer, this .props.pollInterval); }, render: function ( return ( <div className="commentBox" > <h1>Comments</h1> <CommentList data={this .state.data} /> <CommentForm /> </div> ); } }); module .exports = CommentBox;
comments.jsonをpublicディレクトリに作成します。main.jsのときはキーはダブルクォートしませんでしたが、JSONファイルとしてロードする時はキーも"author"のようにダブルクォートしないとエラーになります。
~/react_apps/react-tutorial/public/comments.json [ {"author" : "Pete Hunt" , "text" : "(tutorial 19) This is one comment" }, {"author" : "Jordan Walke" , "text" : "(tutorial 19) This is *another* comment" } ]
gulp browserifyタスクを実行したあと、ブラウザで確認します。
チュートリアル 20 - フォームのsubmitとExpress comment.jsxのCommentFormコンポーネントを修正して、Ajaxでフォームのsubmitができるようにします。実際にPOSTするのはCommentBoxコンポーネントです。CommentFormコンポーネントはフォームのsubmitイベントでonSubmit={this.handleSubmit}としてhandleSubmit関数を実行します。handleSubmit関数の中でonCommentSubmitイベントを発火させて、CommentBoxコンポーネントでバインドしているhandleCommentSubmit関数を実行します。
~/react_apps/react-tutorial/src/comment.jsx ... var CommentForm = React.createClass({ handleSubmit: function (e ) e.preventDefault(); var author = this .refs.author.getDOMNode().value.trim(); var text = this .refs.text.getDOMNode().value.trim(); if (!text || !author) { return ; } this .props.onCommentSubmit({author : author, text : text}); this .refs.author.getDOMNode().value = '' ; this .refs.text.getDOMNode().value = '' ; return ; }, render: function ( return ( <form className="commentForm" onSubmit={this .handleSubmit}> <input type="text" placeholder="Your name" ref="author" /> <input type="text" placeholder="Say something..." ref="text" /> <input type="submit" value="Post" /> </form> ); } }); var CommentBox = React.createClass({ loadCommentsFromServer: function ( $.ajax({ url: this .props.url, dataType: 'json' , success: function (data ) this .setState({data : data}); }.bind(this ), error: function (xhr, status, err ) console .error(this .props.url, status, err.toString()); }.bind(this ) }); }, handleCommentSubmit: function (comment ) var comments = this .state.data; var newComments = comments.concat([comment]); this .setState({data : newComments}); $.ajax({ url: this .props.url, dataType: 'json' , type: 'POST' , success: function (data ) this .setState({data : data}); }.bind(this ), error: function (xhr, status, err ) console .error(this .props.url, status, err.toString()); }.bind(this ) }); }, getInitialState: function ( return {data : []}; }, componentDidMount: function ( this .loadCommentsFromServer(); setInterval (this .loadCommentsFromServer, this .props.pollInterval); }, render: function ( return ( <div className="commentBox" > <h1>Comments</h1> <CommentList data={this .state.data} /> <CommentForm onCommentSubmit={this .handleCommentSubmit} /> </div> ); } }); module .exports = CommentBox;
CommentBoxコンポーネントのAjaxからポストされるJSONを受け付けるため、Expressサーバーを作成します。server.jsはreactjs/react-tutorial からダウンロードします。
$ cd ~/react_apps/react-tutorial
$ wget https://raw.githubusercontent.com/reactjs/react-tutorial/master/server.js
ダウンロードしたExpressの実行ファイルを確認します。
~/react_apps/react-tutorial/server.js var fs = require ('fs' );var path = require ('path' );var express = require ('express' );var bodyParser = require ('body-parser' );var app = express();var comments = JSON .parse(fs.readFileSync('_comments.json' ));app.use('/' , express.static(path.join(__dirname, 'public' ))); app.use(bodyParser.json()); app.use(bodyParser.urlencoded({extended : true })); app.get('/comments.json' , function (req, res ) res.setHeader('Content-Type' , 'application/json' ); res.send(JSON .stringify(comments)); }); app.post('/comments.json' , function (req, res ) comments.push(req.body); res.setHeader('Content-Type' , 'application/json' ); res.send(JSON .stringify(comments)); }); app.listen(3000 ); console .log('Server started: http://localhost:3000/' );
fs.readFileSync('_comments.json')の箇所でロードしているJSONファイルを移動します。
$ cd ~/react_apps/react-tutorial
$ mv public/comments.json ./_comments.json
プロジェクトのローカルにExpressをインストールします。
$ npm install --save-dev express body-parser
PythonのSimpleHTTPServerを停止します。gulp browserifyタスクを実行後、Expressサーバーを起動します。
$ gulp browserify
$ node server.js
Server started: http://localhost:3000/
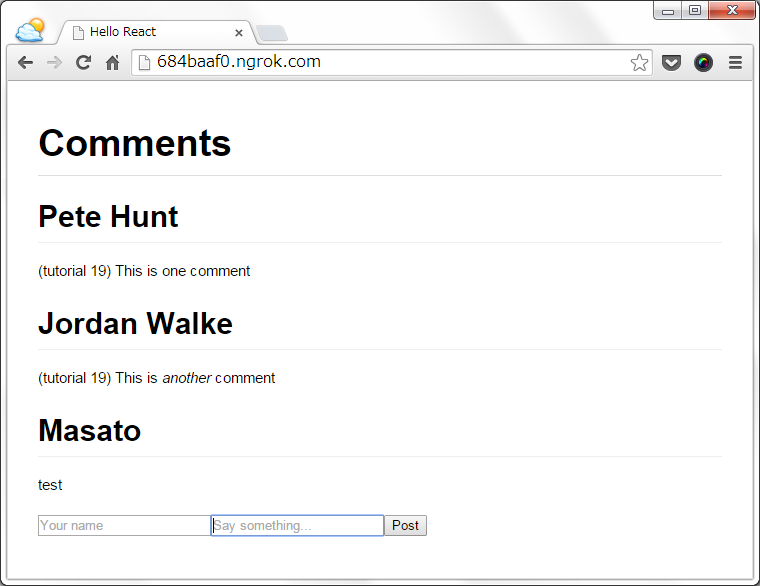
ブラウザでURLを実行するとフォームが表示されるので適当にYour nameとSay somethingを入力してみます。
